
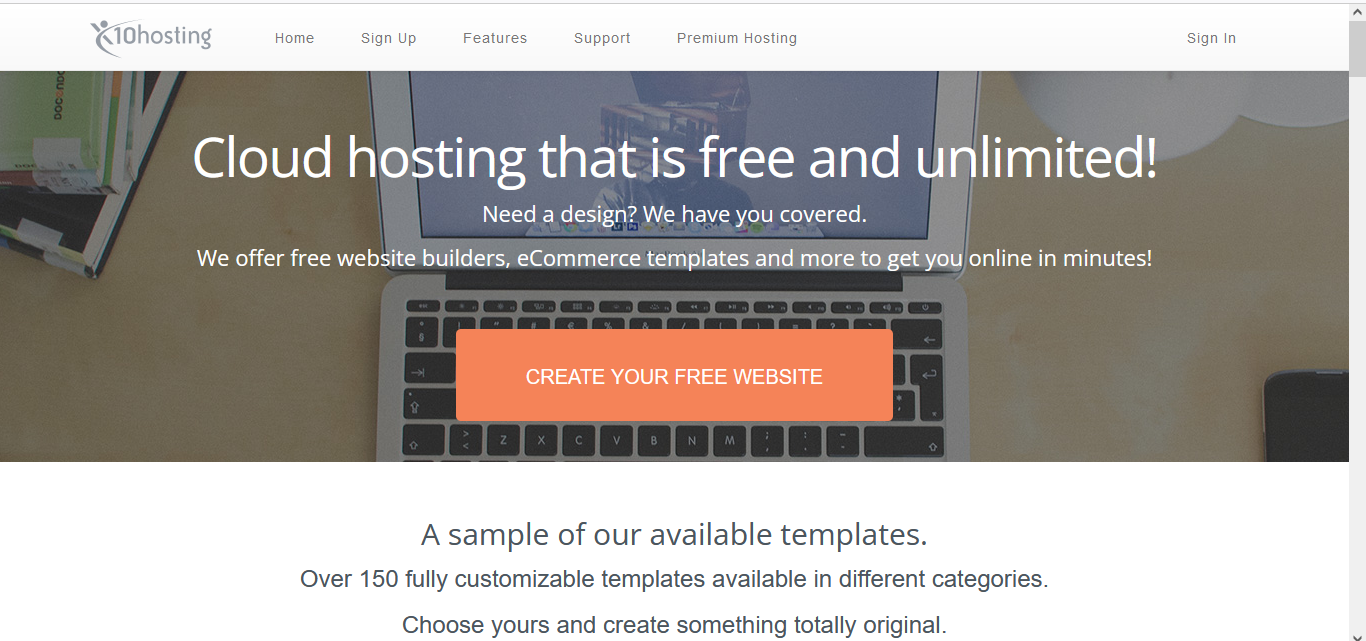
Step 1: Sign Up for an Account
Visit the x10Hosting website: Start by going to the x10Hosting website (www.x10hosting.com).

Sign up for an account: Click on the "Sign Up" or "Get Started" button. You'll be prompted to create an account by providing your email address, username, and a secure password. Follow the registration process.
Step 2: Verify Your Email
After signing up, you will receive a verification email. Click on the verification link to activate your x10Hosting account.
Step 3: Login to Your Account
Once your account is verified, log in to the x10Hosting control panel using your newly created username and password.
Step 4: Add a Domain
Navigate to "My Domains": In the control panel, go to "My Domains" or "Domains."
Add a domain: Click on the "Add Domain" button. Enter your desired domain name and click "Add Domain."
Configure DNS: You'll be asked to set up DNS records for your domain. You can choose to use x10Hosting's default nameservers or update your domain registrar's nameservers to point to x10Hosting. Follow the instructions provided by x10Hosting to complete this step.
Step 5: Upload Your Website
Now that your domain is added, you can start uploading your website files. You can use FTP (File Transfer Protocol) to upload your website files to the x10Hosting server. You can find your FTP details in the x10Hosting control panel.
Step 6: Configure Your Website
Database Setup (optional): If your website requires a database, you can create one from the control panel. You can use tools like phpMyAdmin to manage your databases.
Choose a Website Builder (optional): x10Hosting offers website builders like WordPress, Joomla, and more. You can install these content management systems easily through the control panel.
Step 7: Secure Your Website
Install an SSL Certificate: To ensure your website is secure, you can install a free SSL certificate. This will encrypt data between your website and visitors.
Regular Backups: Enable regular backups through your control panel to safeguard your website's data.
Step 8: Test Your Website
Before making your website live, test it thoroughly to ensure everything is working as expected. Check for broken links, missing images, and any other issues.
Step 9: Launch Your Website
Once you are satisfied with your website's functionality, it's time to make it live. Update your DNS settings if necessary, and your website will be accessible to the world.
Step 10: Maintain and Update
Regularly update your website's content and software to keep it secure and up-to-date. x10Hosting offers helpful resources and support to assist you in managing your site.
x10Hosting provides a fantastic opportunity to host your website for free without compromising on quality and reliability. By following the steps outlined in this guide, you can have your website up and running in no time. Remember to maintain and update your site regularly to ensure it remains secure and functional. Happy hosting!
![WHAT TO DO IF YOU GET 1 PRINCIPLE PASS IN UACE EXAMS [UGANDA]](https://blogger.googleusercontent.com/img/b/R29vZ2xl/AVvXsEh0SZA6p0bXmnrq9HDY_rAlpM6uVl-oklpcuxsQYc4LbM_5xM9jNt48BSZXvuirEOZF9qgnLNiw_GTLrslEh3ZO8VpKzBbO5SQkEOnYHy_mj5XJi0od2l5LJXcQva9R5Pi-tz4XbKlm5OCXLiVtSx3x0WBHUHNOrAr2okfASYLnJyUp0wjqTqxCQJ_u2MpF/s72-c/UACE-exams.png)

![VSDC ACTIVATION KEY 2024 - 2025 [Updated!]](https://blogger.googleusercontent.com/img/b/R29vZ2xl/AVvXsEitmZdM3f458jHxw8JGdwY27jmaLAFtBvjk2THwRKPYpjcjh21nMnUe9o0jVlTmnoh1XpRW1aoBGliMWL46JFD3DuzX7S755M-XJ4hgYXaNxuzRpzTuSIbhEXKw-EGgZSACDcsrv4P4sVmq4_55tzomXohXA0x91J7w7AK07LXXxCimoOXW-5LvYtxoWhlQ/s72-w515-c-h219/vdsc1.PNG)
No comments